 I’ve been using Rebrandable Traffic to drive tons of visitors to my websites for a little over 2 years. When I first started, I didn’t know exactly how to best use the traffic generating website. I created random campaigns and didn’t really utilize all the incredible tools that are provided. Therefore, at first my campaigns weren’t always very successful.
But once I began using the tools and fine tuning my campaigns, I started getting tons of quality traffic and more importantly, I started getting more conversions to my websites and affiliate links. Now I use Rebrandable Traffic practically every day to boost traffic as well as to get more email subscribers.
What is Rebrandable Traffic?
If you are interested in driving more traffic to your website, Rebrandable Traffic has exactly what you need. Traffic comes in from a multitude of websites and is rebranded and matched to you based on the traffic type and the keywords that you have set up in your campaigns. The rebranded traffic then gets sent to the URL you have designated to that campaign.
So basically, Rebrandable Traffic is a website where you can set up different campaigns and drive traffic to any website or link that you want. I send most of my traffic to my WA profile page or to my Camping Website. You are able to add specific keywords, which can be vital when looking for conversions.
There is also the ability to resell the traffic if that’s something you are in to. You simply set up the referral URL to be whatever you want and the customer that you sold the traffic to will see it coming from that URL (not Rebrandable Traffic). There is a customer report that details all the traffic that was sent to your customer.
The cost per visitor is relatively cheap. There are a wide range of credit packages that start at a low $8 ($4 when it’s on sale). This package gets you 1000 visitors.
Sign Up – It’s Quick and Easy
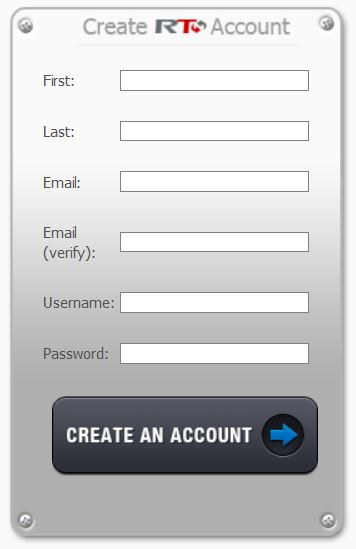
It is free to sign up for Rebrandable Traffic, and literally takes less than a minute. All you need is your name, an email address, a username and password.

Once you sign up, you are automatically given 100 credits…. this translates to exactly 100 visitors. These freebie credits are great for getting your feet wet and taking Rebrandable Traffic for a spin.
I am always a fan of programs that allow you to “test drive” their system before you ever purchase a thing. You wouldn’t buy a car without test-driving it first, right? Probably not. So the fact that you get 100 free credits to use and get acquainted with how RT works is such a bonus.
Create a Campaign – Where do you want your traffic to go?
Creating a campaign is relatively easy, but you will want to pay special attention to several details. If a campaign is not converting well, you might need to tweak the keywords for instance.
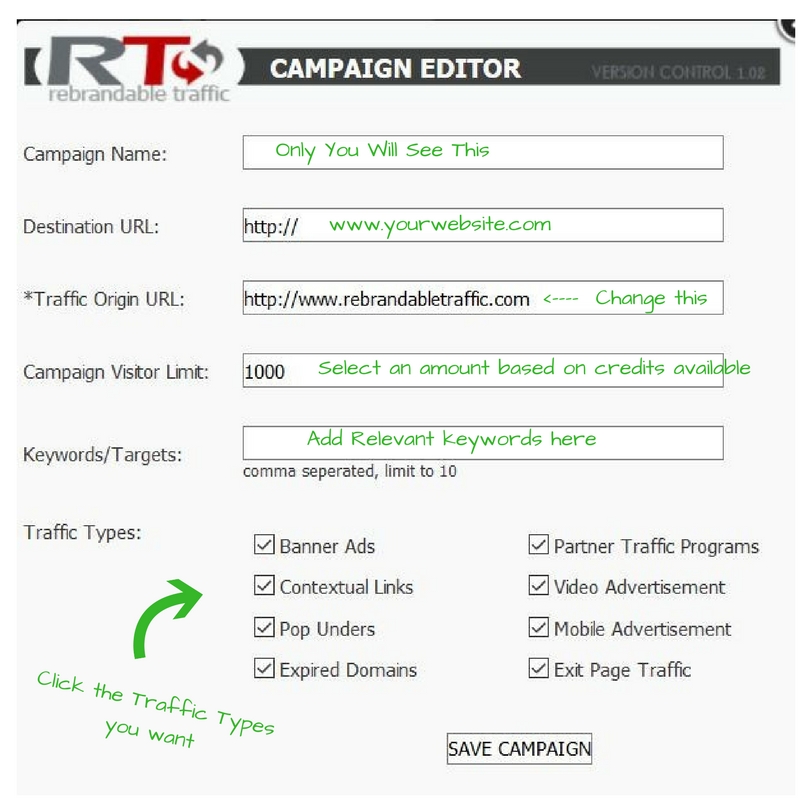
Below are the steps to creating a campaign:
- Campaign Name – Give your campaign a name that will help you identify it later. You are the only person who sees this.
- Destination URL – This should be the URL where you want the visitor to land on.
- Traffic Origin URL – Change this from the default “rebrandabletraffic.com” URL to whatever URL you want. This is definitely important if you are reselling the traffic.
- Campaign Visitor Limit – Change this to a low amount at first (I like to go with 100 credit increments).
- Keywords/Targets – Select up to 10 good quality keywords that are relevant to your destination URL.
- Traffic Types – Here you can check the boxes of the different types of traffic you want.

Pro Tip: Campaigns that perform best are those that send visitors to a page where they can register for free information
Traffic Breakdown Report – Analyze the results
One of the great tools available at Rebrandable Traffic is the Traffic Breakdown Report. Here you can see when a visitor came to your site, how long they stayed and what other links/pages they went to.

As you can see in the above snapshot, this visitor came to my link on 9/3/17 and stayed for 1:16 minutes. (The IP address is also given if you need that information.) This visitor also clicked on my home page and then to the upgrade page during their visit.
This report is also available for you to send to your customers if you are reselling the traffic to others.
Purchase More Credits – Fund successful campaigns
After you have gone through the original 100 credits that you get when you first sign up for RT, you will need to purchase more credits in order to continue running your successful campaigns.
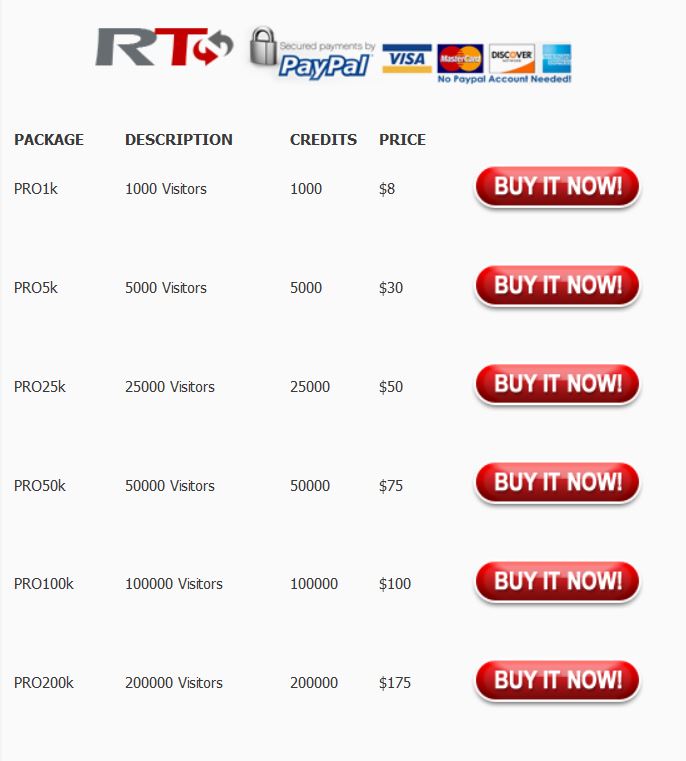
The purchase price is broken down into several different packages. The lowest is only $8 and gives you 1000 visitors. So that comes to $0.008/visitor. The higher you go, the cheaper per visitor it becomes. The highest priced package is $175 for 200,000 visitors. This is equal to a little less than $0.001 per visitor.

So no matter what your budget is, you can find a credit package that works for you. Also, they OFTEN have credit Sales, so be on the lookout for those. This is a great opportunity to get a good deal on the packages. Usually it’s about 50% off.
Conclusion – My Final Thoughts and Recommendation
I am a big fan of Rebrandable Traffic because it is not like all the other “traffic exchanges” where you don’t really get a say in who is coming to your site. With RT, you get to pick keywords and set up real campaigns much like you would at Google Adwords or BingAds… however the price is MUCH cheaper.
My personal suggestion is to give it a try… especially since it is FREE to sign up and you get 100 credits to start. It’s a real easy way to find out if you like it or not.

